Identifying and Repairing Cracked Clock Cases: Restoration Methods
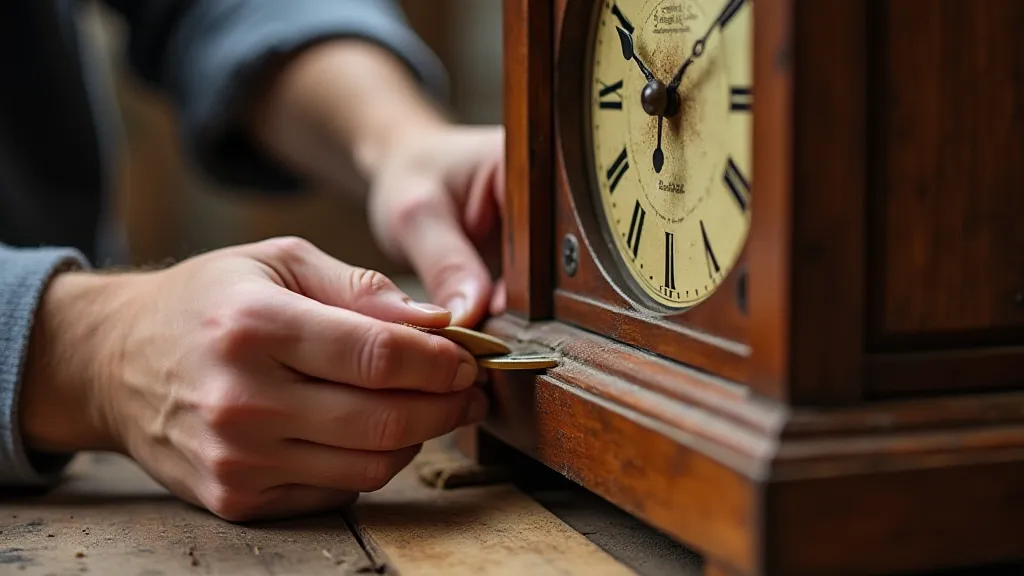
Antique clocks are treasured pieces of history, often displaying beautiful craftsmanship and intricate mechanisms. However, the passage of time and environmental factors can take their toll, and one of the most common issues encountered is a cracked clock case. These cracks not only detract from the clock’s aesthetic appeal but can also compromise its structural integrity, potentially leading to further damage to the movement within. This guide explores identifying the type and severity of cracks and delves into restoration methods to repair them, focusing on preserving the clock's original character and value. Proper maintenance, like understanding common clock oiling points and lubrication techniques, can often mitigate issues that lead to cracking in the first place, so a holistic approach to clock care is always best.
Understanding Crack Origins and Types
Before attempting any repairs, it's crucial to understand why the crack occurred. Common causes include:
- Settling of the Building: Fluctuations in temperature and humidity, coupled with the natural settling of a building, can exert stress on the case.
- Physical Impact: Accidents, bumps, and drops are frequent culprits.
- Wood Movement: Wood expands and contracts with changes in humidity. Excessive changes can cause the wood to split.
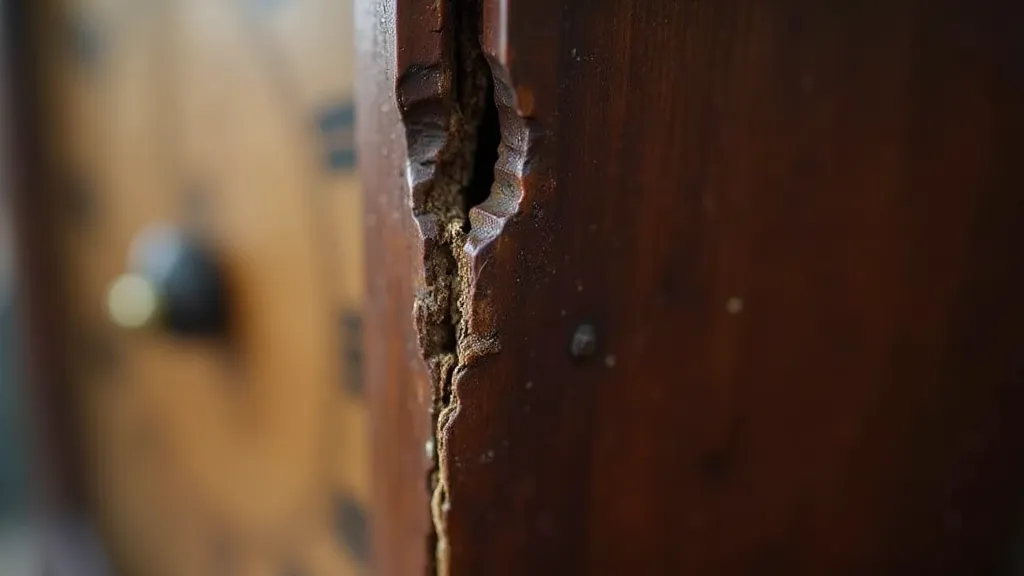
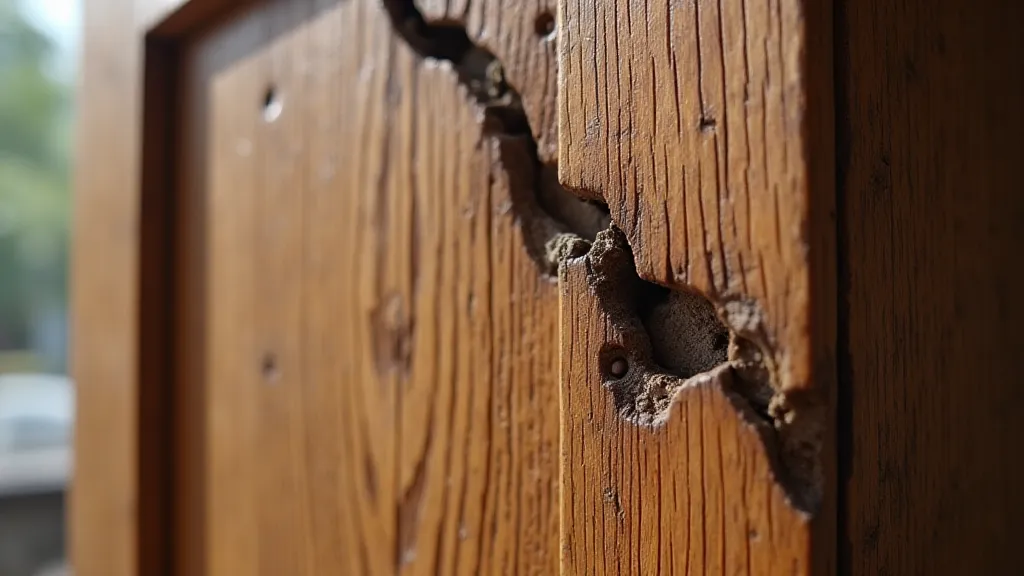
- Insect Damage: Woodworm and other pests can weaken the wood, making it more susceptible to cracking. Sometimes this damage requires more than just case repair; a careful inspection of the clock's internal components is vital.
Cracks can be categorized by their appearance:
- Hairline Cracks: Superficial cracks that are often difficult to see. They usually don't compromise structural integrity significantly but can worsen over time.
- Surface Cracks: These cracks run along the surface of the wood and are often the result of wood movement.
- Deep Cracks: These cracks penetrate the wood's thickness and may extend to the internal frame. They often indicate a structural weakness.
- Splits: Complete separations of the wood, often due to extreme stress or insect damage.
Assessing the Damage – What to Look For
Beyond the visual identification of the crack, a thorough assessment is vital. Consider these factors:
- Location of the Crack: Cracks near joints or corners are more critical than those on flat panels.
- Direction of the Crack: Cracks running with the wood grain are generally easier to repair than those running against it.
- Wood Type: The type of wood will influence the repair method. Softer woods require different techniques than hardwoods.
- Finish Condition: Note the type and condition of the original finish. Matching the finish during restoration is key to maintaining authenticity. Ensuring the finish is properly maintained, similar to cleaning and preserving delicate clock finials and ornamentation, will help prevent cracking due to finish degradation.
Repair Methods - From Simple to Complex
The repair method will depend on the severity and type of the crack. Here are several techniques:
1. Glue-Squeezing (for Hairline and Surface Cracks)
This method involves injecting wood glue into the crack and clamping the wood to squeeze out the excess glue. This is best suited for hairline and surface cracks. Use a fine syringe to apply the glue. Always use a wood glue that is reversible, in case future repairs are needed.
2. Dutchman Repair (for Deeper Cracks and Splits)
This technique involves carefully removing the damaged section of wood and replacing it with a precisely fitted patch of matching wood. This is a more advanced technique that requires skill and patience. Sourcing matching wood is a critical component of this technique, and ensuring its weight and density are as close to the original as possible is essential for maintaining balance, especially relevant to understanding and replacing clock weights.
3. Splinter Repair
When a piece of wood has splintered away from the case, a small piece of matching wood can be glued back into place. Ensure a tight fit and proper alignment. Use clamps to hold the pieces together while the glue dries.
4. Reinforcement with Dowels
For larger cracks or areas where the wood is significantly weakened, reinforcing the area with wooden dowels can provide extra stability. Drill precisely sized holes and glue the dowels in place.
Finishing the Repair
Once the glue has dried and any clamps have been removed, it’s time to address the visible repair. The goal is to blend the repaired area seamlessly with the surrounding original finish.
- Sanding: Carefully sand the repaired area to level it with the surrounding surface. Use progressively finer grits of sandpaper.
- Color Matching: This is often the most challenging aspect. Carefully analyze the original finish and attempt to replicate it. Consider using tints, stains, and shellac or varnish.
- Topcoat Application: Apply a thin, even coat of topcoat (varnish or shellac) to protect the repair and enhance the appearance.
Important Note: Always test any repair techniques on a hidden area of the clock case before applying them to the visible areas. Preserving the originality of the clock case is paramount. If unsure, consult with a professional clock repairer. Further complicating repairs is the intricate escapement mechanism. A malfunctioning escapement can place undue stress on the case, so it’s important to understand understanding and adjusting clock escapements to prevent future damage.

Dealing with Insect Damage in Detail: Beyond the immediate crack repair, significant insect damage often requires a more comprehensive treatment. This involves not only physically repairing the wood, but also eradicating any remaining pests and preventing future infestations. It's important to remember that clock cases, especially older ones, are often susceptible to woodworm and other insects. These pests feed on the wood, creating tunnels and weakening the structure, which can then lead to cracking and further deterioration.
Preventative Measures: To minimize the risk of cracking and insect damage, consider the following preventative measures:
- Humidity Control: Maintain a stable humidity level in the room where the clock is displayed. Fluctuations in humidity cause wood to expand and contract, leading to cracking. A humidifier or dehumidifier can help regulate humidity levels.
- Temperature Stability: Avoid exposing the clock to extreme temperature changes. Rapid temperature fluctuations can also cause wood to crack.
- Regular Inspection: Regularly inspect the clock case for signs of insect damage, such as small holes or sawdust. Address any issues promptly.
- Professional Treatment: If you suspect insect infestation, consider having the clock case treated by a professional pest control service specializing in antique furniture.
- Proper Storage: When not in use, store the clock in a dry, well-ventilated area, protected from direct sunlight and extreme temperatures.
The Role of the Finish: The original finish on the clock case plays a crucial role in protecting the wood from moisture and damage. If the finish is cracked or peeling, it compromises the wood's structural integrity and increases the risk of cracking. When repairing a clock case, it's important to carefully match the original finish and apply it correctly to ensure long-term protection.
Ethical Considerations in Clock Restoration: When restoring an antique clock case, it's important to consider the ethical implications of the repairs. The goal should be to preserve the clock's originality and historical significance. Excessive or irreversible repairs can diminish the clock's value and authenticity. Prioritize techniques that are reversible and minimize the alteration of the original materials.
Advanced Techniques: For particularly challenging repairs, more advanced techniques may be required. These could include:
- Vacuum Impregnation: This method involves using a vacuum to draw wood glue deep into the cracks, creating a stronger bond.
- Epoxy Consolidation: Epoxy resin can be used to stabilize weakened wood and prevent further cracking.
- Wood Grafting: In cases of severe damage, a small piece of wood can be grafted onto the case to replace a missing section.